How To Achieve Neutral Buoyancy Scuba Diving (Made Easy)
How to achieve neutral buoyancy scuba diving the easy way
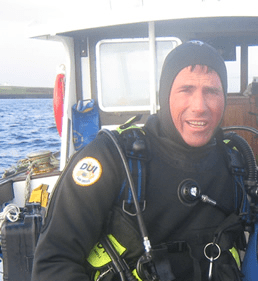
When I first started out scuba diving, achieving neutral buoyancy was the aim. It took a while to master this skill myself. So I wanted to share with you some handy tips for you to learn neutral buoyancy as a novice scuba diver quickly and easily.
“The best advice I gave to students as they started out as newbie scuba divers when I taught as a BSAC diving instructor was to practice buoyancy control, and to achieve this was to dive as often as possible. Some students find buoyancy control easy whilst others take time to master the technique.”
The best way to dive anywhere in the world is by a scuba diving liveaboard. You can check the latest and best deals on liveaboards using the following window (opens in a new window):

10 tips for buoyancy control to achieve neutral buoyancy scuba diving:
- Practice makes perfect.
- Fine tune your weight belt.
- Keep a note of your weight each time you dive.
- Use air sparingly.
- Control your descent.
- Control your breathing.
- Relax.
- Dive tank gets lighter during the dive.
- Leave your inflator alone.
- Duck dive to start your dive.
The secret to achieving neutral buoyancy underwater for scuba divers

The reason why neutral buoyancy is so important to scuba divers is when you get it right you conserve so much more air.
Which means your dives will last for longer. Dives are short enough as it is, being on average around 40 minutes, but by conserving air and if you are able to extend your dive time as a result; happy days!
Once you’ve achieved your certification as a novice diver, this is when you need to cement what you learnt. You now need to to develop your skills and confidence as a scuba diver. One of those skills is buoyancy control and here are ten tips to achieve that.
1. Practice, patience and experience will perfect the skill to achieve neutral buoyancy
Patience and practice are key. Being patient is important when you’re learning any new skill. But what’s also important to perfecting a new skill is practice.
As they say practice makes perfect. The more you dive, the more you’ll get used to the effects of pressure as you go deeper. The more you practice getting yourself neutrally buoyant, the sooner you’ll achieve success.
2. Fine tune your weight as you gain scuba diving experience will help with buoyancy
Fine tuning your weight will help with achieving neutral buoyancy. At the start of scuba diving you’ll more than likely be ‘over-weighted’ for safety reasons. It’s safer when you’re a beginner scuba diver to have excess weight rather than be under weight.
The reason for this is to reduce the risk of you coming to the surface too fast when you ascend at the end of your dive, thereby causing an air embolism.
However, the sooner you can progress to trimming off the amount of weight you have on your weight belt, the quicker you’ll master neutral buoyancy.
You want to have just enough weight to be able to break the surface and begin your descent when you’ve emptied your BCD of air, or ideally not completely emptied it.
The best way to check your weight at the surface, is with an empty dive tank and with no air in your BCD. When this is the case, you should be at eye level with the surface of the water.
I suggest you explain to the dive skipper and the dive master that you’d like to do a scuba buoyancy check at the end of your dive, in order to correct your weight.
So when you return to the surface, when your dive tank is empty of air, test to see where you sit in the water with an empty BCD. If you sink below the surface, or if you float too high in the water, your weight is not right. Add or subtract weights until your eyes are level with the surface.
I suggest you repeat this exercise a number of times, as you progress with your experience. Because as you gain experience and gain confidence, you are likely to require less weight.
This exercise is well worth the effort, as in the long run you’ll achieve neutral buoyancy, but much faster by perfecting the amount of weight you carry.
3. Note of the weight you used for your last dive when you were neutrally buoyant at the surface
Depending on how often you dive, and depending on how good your memory is, will be factors in deciding whether you need to write down how much weight resulted from the above exercise.
However, I would recommend you write this down, so that the next time you dive, you’ll know what weight to put on. Always remember that the amount of weight you need will be affected by what other equipment you have with you. One major factor to affect your buoyancy is the thickness of your wetsuit. The thicker the wetsuit, the more weights you’ll need.
So I suggest that if you do different diving in different thickness wetsuits, or also if you dive in a drysuit too, that you make a note of each weight total for each of the different equipment set ups you have.
4. Use air sparingly and only put small amounts of air into your buoyancy control device as you descend
Controlling the amount of air you put into or release from your BCD is important to perfecting buoyancy control.
When you are inflating your BCD, only put very small amounts in each time. This prevents you from over inflating your BCD, which would result in you becoming excessively buoyant, which would require you to release the excess air to compensate.
When releasing air as you ascend make sure you do the same by releasing tiny amounts each time.
If during the dive you come up to a shallower depth you will need to reduce your buoyancy. If you are too heavy handed and release too much air, you’ll end up descending again as you’ve become negatively buoyant. This would result in you having to add more air to compensate.
By carefully adjusting the amount of air in your BCD. Increase and decrease it by small amounts. This gives you more control over the effects this has on your buoyancy. Thereby only using the correct amount of air at each stage of your buoyancy state.
5. Controlling your descent will help you avoid crashing into the seabed or adding excessive air as you reach the bottom
Avoiding touching the seabed by being in control of your buoyancy is important. It’s not always a good idea to settle on the sea bed. Although this does depend on what the seabed consists of.
If it’s sand, this should be okay, but look out for stone fish or scorpion fish, as these have nasty spikes with poison. However, if the seabed is coral, then absolutely do not to settle on this.
To help with stopping your descent before you hit the seabed, and to avoid over-inflating your BCD, don’t wait until you are nearly at the bottom, before you start to put air in your BCD.
As you descend to the bottom, you’ll become less and less buoyant. Start to slowly add tiny bits of air into your jacket as you approach the bottom.
It’s a bit like applying the brakes in your car, as you begin to approach a junction. You don’t slam the brakes on when you’ve arrived at the junction, if you did so you’d end up skidding, and it’s likely you’d over-shoot the junction too.
So instead of applying your brakes too close to the junction, you normally start to gently apply these sometime before the junction.
The same principle applies to diving. By putting small amounts of air into your BCD is similar to the gentle application of your breaks as you approach the junction, where the seabed represents the junction.
Using this approach prevents you from over inflating your BCD, which is what you would end up doing if you started to add air too close to the seabed, to prevent yourself from bumping into it. The effect of which would likely be to over-inflate your BCD. You’d begin to rise up again and then to compensate this, you’d release some air and so on.
This wastes valuable air and makes for inefficient buoyancy control.
6. Use your breathing as part of your buoyancy control to maintain neutral buoyancy
WARNING: With this buoyancy tip; be careful not to hold your breath when you’re diving. This is extremely dangerous and can cause serious injury or death!
However, having given this warning, you can use your breathing (i.e. using your lungs as buoyancy) as part of your buoyancy control.
On your descent, exhale from your lungs, as these are one huge buoyancy unit. This is a useful technique where you are struggling to get down from the surface. But it’s better to exhale first, before you empty your BCD completely. This way you’re conserving some air in your BCD, thus reducing how much air you’ll need to inflate it as you reach the bottom.
On the dive, if you want to go slightly deeper, but without touching your BCD controls, exhale some air from your lungs and take shallower breaths. This will reduce the amount of air in your lungs and make you less buoyant.
Also, you can keep slightly more in your lungs to make yourself slight more buoyant to rise up over a slight incline on the seabed. But with this maneuver, be careful not to holding your breath. Still keep breathing, but don’t completely exhale to provide that bit more buoyancy.
This technique comes with practice and is about control.
7. Relax and avoid excessive movement of your arms and legs will help with your buoyancy control
Additional movements of your arms and legs can make you rise up with realising what you are doing. Frailing arms and excessive finning are usually signs of nervousness. Try to relax and stay calm, diving should be fun.
If you are nervous, over time this will improve and you’ll become more relaxed and less nervous with more dives.
With your arms, it’s always good practice to fold these across your the bottom of your chest, or keep them by your sides. There should be no need to use your arms much at all on the dive.
Finning should be gentle and controlled. You should adopt a horizontal stance. If anything, your head should be very slightly above your feet, so that you’re slightly off the horizontal. But you shouldn’t be vertical.
8. Be aware that your dive tank becomes lighter towards the end of the dive which will affect your buoyancy
As you consume your air, your dive tank will get lighter. This means that at the end of the dive, you’ll be more buoyant than you were at the start of the dive.
This is where you have to be a bit careful on your ascent. If you struggle to get down at the start of the dive with a full tank of air, you may well find that as you approach the surface, and particularly, as you enter the last 10 metres (33 feet), you may find in more difficult to stay down at the end of the dive.
If this is the case, you probably have too little weight on your weight belt.
9. Once your buoyancy is set leave your buoyancy control device inflator alone
Once you’ve set your buoyancy to the correct level on reaching the bottom, leave it alone. There should be no need for your to add any more air or dump any air from your buoyancy control device during the course of the dive.
This is unless, you change depths. Some times a dive will begin at one depth and then progress to a shallower depth. Of course when you change to this shallower depth, you’ll need to adjust your buoyancy by letting out some air from your BCD, but then once again you should leave it alone, until you begin your ascent.
10. Force your descent by using the surface dive technique (or duck dive) helps to start your descent
When you first jump in the water, there’ll be pockets of air in and around your wetsuit, and these all take time to disperse. Which they will do over the course of the dive.
The effect of this will be to create more buoyancy. Which can make it more difficult to break the surface and dive down.
Using a surface dive, like you would if you were snorkeling, is one way to overcome this problem. This way you force the dive.
However, this will make your descent quicker than it would be normally. Therefore, make sure you are ready to equalise your ears, as the pressure builds.
How do scuba divers control their buoyancy?
Before I answer the question of how scuba divers control their buoyancy, first a quick introduction to buoyancy and the physics of scuba diving.
Introducing Boyles Law and why this is important to neutral buoyancy diving
Boyles law is what affects scuba divers as they go deeper and is why buoyancy is so important.
The pressure at 10 metres (33 feet) is twice what it is at sea level. The effect of pressure as divers go deeper causes us to become less buoyant, which is why buoyancy control is so important for neutral buoyancy diving.
Understanding Boyles law is without a doubt very important to neutral buoyancy diving. As a scuba diver, Boyles law affects you every time you enter the water. The air spaces in your body and in your equipment are subjected to pressure and volume change. This pressure change is in direct proportion to your depth. The deeper you go the greater the pressure.
For example, at 10 metres (33 feet), the water pressure is twice that of atmospheric pressure than it is at sea level. Which is the biggest pressure change, either on descent or ascent on a dive. If you go to 20 metres (66 feet), the pressure is three times atmospheric pressure, and so on.
But why is Boyles Law important to scuba diving and to buoyancy?
The reason this is important to buoyancy, is that as you descend to depth, the air spaces in your body and in your equipment get squeezed, which results in a negative buoyancy affect on you. Effectively you become more dense than the surrounding water. If you imagine dropping a stone into a bucket of water, this sinks straight to the bottom.
The reason it sinks is because it’s more dense than the water in the bucket. Displacement plays a role in this too, which is why although a boat is more dense than water, because of the shape of the hull and due the the amount of water the hull displaces, a boat floats.
But unlike a boat, which displaces water, you and the stone in the bucket, don’t displace enough water to float. As we descend still further, the pressure increases, the air spaces get squeezed more, we become even more dense, which results in us sinking yet further and become even more dense, and so on.
If divers didn’t have a buoyancy control device (BCD), they’d continue to sink to the bottom and wouldn’t be able to compensate for effects of the increases in pressure.
If we didn’t have equipment, like the buoyancy jacket to compensation this negative buoyancy effect, we’d continue to sink, just like the stone in the bucket.
So how is this negative buoyancy controlled by scuba divers?
Buoyancy is controlled by using a combination of enough weight to get you below the surface, to being the descent and to make you more dense than the water at the surface.
But as the descent starts and Boyles law kicks in, to compensate the increasing negative buoyancy (i.e. the increase in density) as you go deeper, a diver simply adds more air into his buoyancy jacket (BCD or Stab Jacket).
Introducing the scuba diving buoyancy control device

To control buoyancy, a scuba diver wears a buoyancy control device. Alternative names for this buoyancy device are buoyancy aid and stab jacket.
The BCD is essentially a big air pocket and has an inflator hose to add air and dump valves to release air. As a diver descends, and becomes more negatively buoyant, to compensate for the negative buoyancy effect, they simply top up the BCD with more air.
However, in reverse, as a scuba diver ascends, they simply release air from the dump valves to reduce the increased buoyancy, as the pressure reduces during the ascent.
When you are learning to dive, always remember that the last 10 metres (33 feet) is where the biggest pressure change occurs. On ascent, the pressure change between 10 metres (33 feet) and the surface halves. This means that a litre of air at 10 metres (33 feet) would double to 2 litres by the time it reached the surface!
The effects of Boyles laws means that your lungs will double in size when ascending from 10 metres (33 feet) and the surface.
That means that if you were to hold your breath and continue with your ascent, your lungs would rupture, as the air inside them would double in volume!
A further tip to conserving air when filling your BCD with air at the surface
Other than checking that the BCD inflator works and is connected correctly during your buddy check, don’t use your inflator to put air into your BCD. Use the mouth piece on the BCD and blow into this and add the air by breathing into it.
More Reading: How do I get a dive buddy? (5 easy ways to find a dive buddy)
By doing so, you’ll conserve what air you have in your dive tank that little bit more. This is especially important when you’re a beginner diver, as you’re more likely to consume more air as a beginner.
I personally have to find every way that I can to conserve my air as a scuba diver. I’m a guy for one (and guys consume air at a faster rate than women). Plus I’m a big guy at that, standing in at 6’6″.
Where I consume more air than the average person, to stay down on a dive the same length of time as scuba divers who are much smaller than me, is a challenge. Which is why, if I can find ways to conserve my air, I will.
I hope you enjoyed this article about how to achieve neutral buoyancy scuba diving
I’d love to hear from you. Tell us about your adventures of diving and snorkeling, in the comments below. Please also share your photos. Either from your underwater cameras or videos from your waterproof go-pro’s!
If this article hasn’t answered all of your questions. If you have more questions either about snorkeling or scuba diving (or specifically on neutral buoyancy diving), please comment below with your questions.
There will also be many more articles about scuba diving (and on snorkeling) for you to read and learn about this fabulous sport.
Have fun and be safe!