Scuba Diving Equipment Essentials (What Do You Need To Start Diving?)
What equipment do you need when you start scuba diving; where to begin?
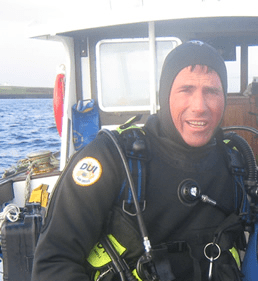
I remember when I first started scuba diving being very excited. Rather than just the scuba diving equipment essentials, I wanted to buy all my own kit as soon as I could. But this approach is not always the best one. If you’re like a kid in a sweet shop like I was, please take a few moments to read this first.
The best way to do more diving and to use your diving equipment, is to book yourself on a scuba diving liveaboard. You can check the latest and best deals on liveaboards using the following window:

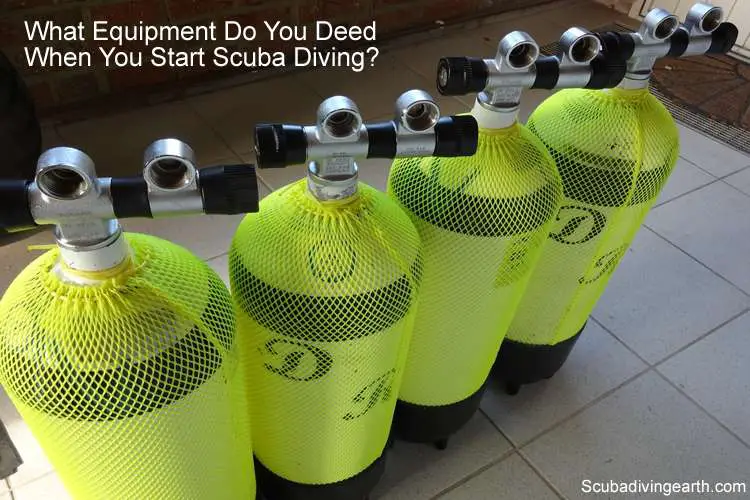
Scuba diving equipment essentials:
- Diver’s watch.
- Mask + snorkel.
- Fins.
- Wetsuit or drysuit.
- Regulator.
- Buoyancy control device (BCD).
- Dive computer.
- Weight system.
- Air tanks.
- Dive torch.
- Divers knife.
- SMB.
- DSMB.
- Compass.
- Divers slate.
- Emergency signalling devices.
- Dive tables.
- Dive bag.
- Cameras or Gopro.
I’ve assumed you may approach the buying of your scuba diving equipment on a piece-meal basis. So the scuba gear is listed in a rough order that I’d buy it myself if I had to start all over again.
What equipment do you need to go scuba diving and what is essential?
I thought for a while whether the first of the scuba diving equipment essentials should be a watch or your mask, snorkel and fins. From these first two equipment essentials, either is a good choice.
But one of the best investments you should make before you buy your mask snorkel and fins, is to buy a watch which is suitable for scuba diving. Most people have a watch in any event, so make yours a diver’s watch.
1. Scuba diver watch is essential equipment for diving
A dive watch is an essential piece of kit to have when you scuba dive. If at a later stage you invest in a dive computer (and I recommend you do), and this fails, a watch will be your backup timing device when you dive.
Pro diver tip: Always check your dive watch and take a note of the time when you leave the surface.
You may wish to jump forward to the dive computer section of this article, as may decide to combine your dive watch with your dive computer and buy a ‘dive watch computer‘ instead.
But if you just want a stand-alone watch, if must be one that’s suitable for scuba diving. For the watch to be suitable for scuba diving, it should be approved to stand a depth of 200 metres (656 feet).
You’ll never dive to 200 metres (656 feet), but this depth approval rating is recommended as a guarantee it won’t leak underwater. Dive watches are essential for scuba diving, but tend to be more expensive than a standard watch.
Pro diver tip: When you have to replace the battery in your dive watch, you must have it done professionally. Watch repairers have the correct equipment to seal the watch properly, which means it won’t leak when you next dive.
Having a watch when you’re snorkeling is also always handy to have. This way you’ll know how long you’ve been out snorkeling. Which leads nicely onto the next of the scuba diving essentials equipment.

2. A mask and snorkel are essential equipment for scuba diving and snorkelling
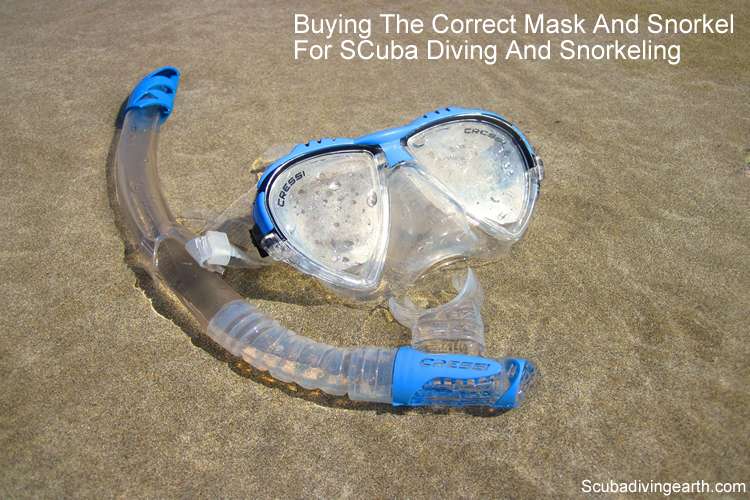
Buying the right mask for scuba diving
Buying your mask is important to get right.
The two aspects to get right include:
- Buying for comfort.
- Buying a mask that doesn’t leak.
Normally, if you get the first of these two right, the other will follow. But begin with the best fit, which should make the mask comfortable to wear, and your mask should then leak.
It is also important to get the right mask that works for scuba diving as well as for snorkeling. Not all masks suitable for snorkeling can be used for scuba diving. For example, the full face snorkel mask is not suitable for scuba diving. Firstly because you can’t equalise your ears using a snorkel mask and secondly the lenses are made of plastic.
Dive mask lenses must be made of tempered glass to be safe to scuba dive with.
Checking for mask fit and seal
To assess whether a mask is correct for your face, i.e. the mask fits the contours of and the shape of your face, you need to try the mask on.
It’s important to check your mask for a good fit. But before you use it for either snorkeling or scuba diving. Otherwise you’ll not be able to return it for one that does fit correctly once it’s been used.
Check the mask seal and fit before you use the mask for scuba diving or snorkeling. Otherwise if you find out on the dive it leaks, you’ll not be able to return it to the shop.
To check the mask:
- Put the mask strap around the front of the mask and place the mask on your face.
- Then breath in through your nose. This should ‘suck’ towards your face, as you extract some of the air from the mask air space.
- Let go of the mask, whilst at the same time you keep inhaling through your nose.
- If the mask is right for you, it will remain on your face even when you let it go.
- If the mask falls off your face it means it doesn’t have the correct fit for the contours of your face. A mask that does not stay on your face when you perform this exercise is more likely to leak underwater.
However, a mask that remains on your face is perfect and will not leak.
Just in case the mask doesn’t fit correctly when you perform this test, as you let go of the mask with your hands, leave them cupped under the mask so that if it falls you are able to catch it to avoid damaging the new mask.
If it doesn’t fit correctly, you want to be able to return it undamaged.
Scuba mask seal for a beard and moustache
One extra consideration when you’re checking your scuba mask seal, is if you have facial hair. Facial hair such as a beard or mustache interrupts the mask seal around your face.
Performing the above exercise with a mask when you have facial hair may not work as well. You may also find that the mask may leak underwater where you have a beard or a mustache in any case, no matter how good the seal.
Checking for mask comfort
For mask comfort, I suggest that you place the mask on your face with the strap around the back of your head as you would normally wear the mask. If it feels uncomfortable when you do this, don’t buy it.
Wear your mask around the house to check it for a comfortable fit. You need to be sure that it’s going to be comfortable on a dive of 30-40 minutes in length.
Imagine wearing the mask for between 30-40 minutes at a time, with water pressure pushing on it underwater. If the mask is uncomfortable after a few moments of having it on your face, then after a long dive it will become very uncomfortable.
If you’re happy to, you may even keep it on your face for a while and walk around the house. The longer the better. Your family around you may laugh or make fun of you. But what the heck, life is about making it fun anyway!
If you perform the best fit ‘mask leak test‘ exercise above and buy a good mask made of soft silicone, then it should also be comfortable too.
Make sure the mask’s skirt, which is the part that creates the seal around your face, is made of silicone. You can buy cheaper masks from beach shops and the like where the skirt is made of plastic instead.
Don’t buy one of these, as they will not be as comfortable. Also, the seal will not be as good either.
When the mask is on your face, check that you are able to squeeze your nose and equalise your ears too.
Types of scuba mask
The decision doesn’t stop there either, as you can buy various types of mask. These include the low volume, full face, single or double lens masks. Plus you can also get a prescription lens mask too.
Most of this is down to preference. For example, the volume of the mask refers to the air space inside the mask. The smaller that sir space, the easier it is to equalise the pressure.
But unless you are free diving and you need to keep as much air in your lungs as possible, you don’t need to buy a low volume mask for scuba diving. A low volume mask will also be easier to clear of water though, if the mask should flood.
The other consideration for buying your first scuba mask is whether you require glasses to see. If you wear glasses and need these to see well, then you would be better to buy a scuba mask that can be fitted with prescription lenses.
For this purpose you are better to buy a mask with split lenses, rather than one with a single lens.
Buying the right snorkel
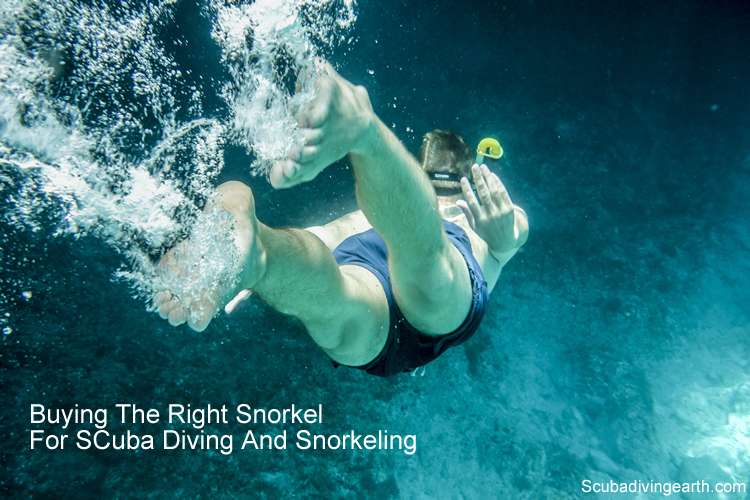
A snorkel is an essential piece of equipment for snorkeling. But you may be wondering why you need one for scuba diving too.
In an this article how to conserve air when scuba diving, I explain how you can conserve air on the surface by using your snorkel instead of your regulator. This conserves the air in your dive tanks for the dive.
Depending on where you’re diving and the number in your dive party, the amount of time you spend on the surface before you descend can vary.
This is also affected by if you’re one of the first to jump in. If you’re having to wait for a while for the others to join you use your snorkel. I always recommend to take a snorkel on every dive for this reason.
Buying your snorkel
When you buy a snorkel, firstly don’t buy a snorkel that’s integrated with your mask. These types of snorkel masks don’t work for scuba diving. You must buy a snorkel that’s separate to your mask, but that attaches to it with a rubber clip.
Then you have the decision of choosing between a straight through snorkel. Or one that has a close-off valve at the end.
The snorkels with the close off valve don’t fill with water when you’re snorkeling and perform surface dives. Whereas the straight through snorkels do. So on your return to the surface you have to blow out the water before continuing to breath.
Either of these versions of snorkel are fine, but I personally prefer snorkels that are the straight through version.
3. Fins for scuba diving (and for snorkeling)
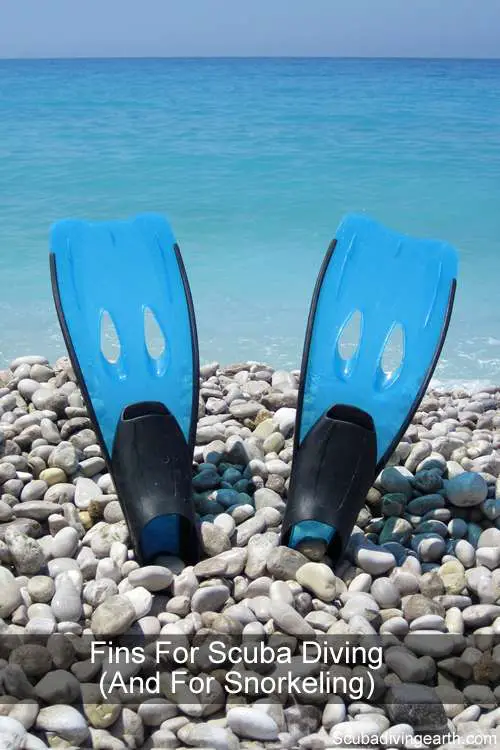
There are essentially two scuba fin types:
- The first is the the full-foot style of fin which slips on like a shoe. This type of fin are best for scuba diving (or snorkeling) in warm waters. You won’t need a separate foot boot for insulation and warmth.
- The second type of fin is one with an open heel. This type has a strap to hold the fin on your foot. The foot pocket is designed so that your foot will fit when you’re wearing either wetsuit boots (booties) or a dry suit. These are essential for diving in colder waters to keep your feet warm.
More Reading: What is the difference between a wetsuit and a dry suit?
The other benefit of wearing booties is to provide comfort for walking on a rocky shore.
You could buy a set of each type of fin and choose the type that suits where you are diving. However, I’ve opted to use the open heel fins as I’m either diving with booties in warm seas or I wear a dry suit in colder waters.
Fin propulsion underwater
One of the considerations for your fins is how well they propel you through the water. You want the fins to be good at propulsion, so that you conserve air on your dive. The more efficient your fins are, the less energy you use and hence the less air you’ll consume.
What’s the next stage in the equipment purchase?
The bonus from having your own mask, snorkel and fins is that you’ll also be able to snorkel on your holiday or vacation in between your scuba dives from your resort.
Having the basic equipment of mask, snorkel and fins you’ll still be able to dive, but you’ll have to rent or hire the scuba equipment each time.
So now that you have the very basics of equipment for both snorkeling and scuba diving, you will be able to dive with just these by hiring or renting the kit wherever you dive.
Whilst on the subject of renting scuba equipment vs buying your own equipment, there are three thoughts on this. The first is a weight issue when you travel. Invariably, you’ll need an additional suitcase purely for scuba equipment, depending on how light you travel otherwise.
Secondly, there’s the cost saving over time by having your own kit. Each time you rent your scuba gear, you could have put that towards your own equipment.
Plus by having your own kit means that you’ll be able to dive at home as well as when you travel.
The third and probably the most important consideration is diver safety. I would argue that if you always dive with your own familiar kit, you are safer than when you keep diving in unfamiliar kit that’s new to you each time. This may be okay when things are running smoothly. But it’s when things go wrong that familiarity helps you to stay calm.
4. Drysuit or wetsuit for underwater protection and/or insulation (exposure suits)

One of the main reasons you need an exposure suit is because water removes heat from your body 25 times quicker than air does.
For example, when the air temperature is around 21 degrees Celsius (70 Fahrenheit) this feels warm. However, if you’re in water for a prolonged period of time at this same temperature without suitable insulation you would get cold.
For exposure suits there are essentially three alternatives, which include:
- Body suit or dive skins.
- Neoprene wetsuits or semi-dry suits.
- Drysuits.
Body suit or dive skins
A bodysuit or dive skin is the thinnest protection you can wear underwater. These are normally made of a Lycra type material or other very thin protection.
The main reason why people wear these is more for protection against corals or for sun protection. Their warmth and insulation properties are minimal.
Neoprene wetsuits or semi-dry suits
The next option is to buy a neoprene wetsuit or a semi-dry suit. Wetsuits are the most popular form of insulation against heat loss underwater. They work on the basis that the neoprene has extremely good insulation properties. But also whilst being flexible and comfortable to wear too.
The way it works is that a thin layer of water lies between your skin and the neoprene. This thin layer of water warms up and helps to keep the body warm.
Which is why it’s essential that which ever wetsuit you buy, it must be a snug fit. It should be the one that fits like a glove.
The last wetsuit you want to buy is one that is baggy. A baggy wetsuit will allow too much water to flush through the suit and you’ll get cold.
This reminds me of a dive I did in Plymouth, UK. A relative beginner scuba diver donned his wetsuit, which let’s say was more than just baggy. I told him he would get cold within a very short space of time. But he didn’t want to listen to me. He returned to the surface very quickly and was shivering extremely violently trying to keep warm.
The other considerations when buying a wetsuit or a semi-dry suit include the following:
- The thicker the neoprene, the better the insulation will be and the warmer you’ll be underwater. However, this will have an impact on your buoyancy, as the thicker the neoprene the more buoyant you’ll become. For this you’ll have to compensate the added buoyancy with more weight.
- The deeper you dive, the neoprene will become thinner under the added water pressure. Neoprene is made from closed cell foam. Which means that the rubber contains thousands of tiny bubbles and is what gives it its insulation properties. However, it’s these air bubble that compress under pressure at depth. The result of the crushing effect of the neoprene is that the insulation properties reduce and you may get colder at depth.
- You have the option to buy either a full length wetsuit or a shorty wetsuit, where the arms and legs are cut off at the elbows and knees. A full length westuit will provide more warmth, so the choice comes down to the water temperature you’ll be diving in. Water temperature below around 26-27 Celsius (78-80 Fahrenheit), I would recommend using a full length wetsuit.
- For water temperature down to around 21 Celsius ( 70 Fahrenheit), you will probably we okay with a full length wetsuit of somewhere between 3-7mm thick.
- For colder waters, you may consider a semi-dry suit or a Farmer John or jumpsuit. Both of these types of wetsuit constitute two pieces, where there’s a double layer of protection around a divers torso or mid-section. With the difference between the semi-dry and a farmer john is that the semi dry has neoprene seals around the wrists and ankles to limit the ‘flush’ of water in the suit. The disadvantage of these wetsuits is that they are extremely buoyant, plus they can be more uncomfortable to wear, as you have a double layer of suit which can restrict your movement.
Drysuit insulation and exposure suits
A better option for colder waters than the semi-dry suit is to use a dry suit. The concept of a dry suit is exactly that, you remain dry under the suit.
There are three options for a dry suit, which include a membrane dry suit, a neoprene dry suit and a crushed neoprene dry suit.
For the membrane and crushed neoprene style of dry suit, the insulation is provide by the trapped air inside the suit, but also from wearing under garments under the suit. The suits themselves don’t provide much buoyancy, although the crushed neoprene is more buoyant that the membrane suit, but what the scuba diver wears underneath and the trapped air inside does.
The best option for both the membrane and crush neoprene dry suits is to buy an all in one body suit like a woolly bear to keep warm, which you’ll put on first before your dry suit.
More Reading: What is the difference between a drysuit and a semi dry suit?
Dry suit diving requires further training, as the buoyancy control is different.
The alternative dry suit, which is the neoprene style means that insulation is provided by the combine properties of the neoprene and the air trapped inside the suit. For this type of suit, you only need to wear basic clothes like shorts and a t-shirt. Also, these suits are more buoyant as a suit, plus the air inside provides buoyancy too.
5. A set of scuba diving regulators (Including an alternative air source and air contents gauge)
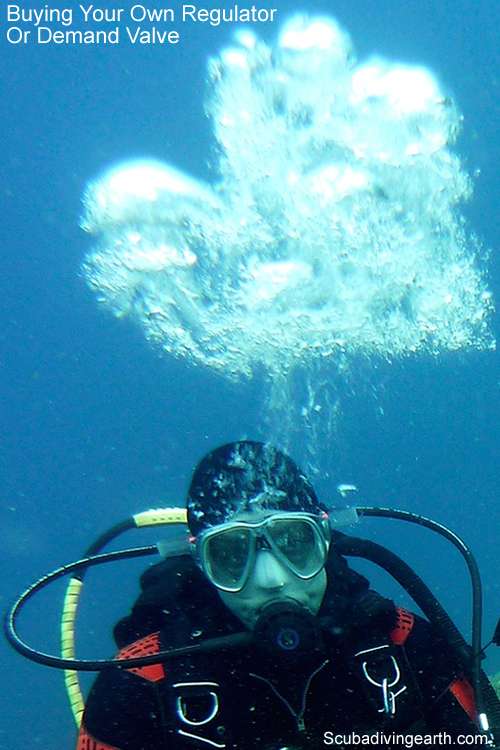
Every regulator is different and I prefer to have one that I am familiar with when I scuba dive. The way a regulator works is; air gets supplied to you, as you demand it when you breath in. Hence the alternative name ‘demand valve.’
Whilst it may only be a small thing, I prefer to use the same regulator each time I dive. The way my regulator works ‘on-demand’ is familiar to me. Whereas if I use one from a dive centre, it may be a different brand or even the same brand, but with a slightly different demand valve function.
The other reason you may prefer your own set of regulators is hygiene. Whilst regulators are washed after each dive, they have still been in someone else’s mouth for 30-40 minutes at a time. So if you prefer to only use your own set of regs, where only your mouth is used on them, then this is a good next step in building your scuba equipment.
Scuba diving regulators are an important purchase for any diver. They are the most important piece of life support equipment you can own.
Your regulator is the most important piece of scuba equipment, as this is your life support system when you scuba dive. Also, you must buy an alternative air source as a part of your regulator set to use in case of an emergency with your buddy.
So for this reason, make sure you invest in a good set of diving regulators. You don’t have to buy the most expensive, but what I would recommend is you buy a recognised brand.
Alternative air source regulator
When you buy a set of diving regulators, you must also include with this purchase an alternative air source too. Safe diving practice advises to always dive in buddy pairs. Safe diving also advises to have an alternative air supply for your buddy should their air supply fail (visa versa too of course).
More Reading: How do I get a dive buddy? (5 easy ways to find a dive buddy)
This means you’ll be buying two regulators that both attach to the one high pressure first stage, which is the part that attaches to the scuba tank.
Submersible pressure gauge (air contents gauge) and gauge console
When you buy a set of regulators for the first time, you must also purchase a submersible pressure gauge and gauge console.
This is the gauge that monitors the amount of air you have left in your dive tank.
The console usually also has a space for other gauges, for example a depth gauge, a compass or a dive computer.
More Reading: Do empty scuba tanks float? (This depends on the material they are made from)
Low pressure inflator hose
The last type of hose that attaches to the first stage are low pressure inflator hoses. These are the hoses that attach to your buoyancy control device (BCD) and/or to your dry suit (see below).
This is the hose that supplies the air to your BCD and/or your dry suit, to provide buoyancy underwater.
What’s the next purchase
So you’ve now added the first piece of equipment to your kit that is dedicated to scuba only.
Having your own regulator is the first of the bigger investments you’ll make when you buy your scuba equipment.
The next I have chosen is the buoyancy control device (BCD). There was a bit of a tie between your own buoyancy control device (BCD) or your own dive computer. But it may be you already have the dive computer, if you opted to combine this with your divers watch above.
So lets take a look at BCDs as the next step.
6. Buoyancy control device (BCD)
As with diving using your own set of regulators, having your own BCD is also great from a familiarity viewpoint. Also, once you have this (along with the other scuba equipment listed so far) you’ll no longer have to rent or hire equipment ever again. This will save you money on your dives when you’re on holiday or vacation.
Controlling your buoyancy is probably one of the most important skills to learn and master as a scuba diver. Buoyancy control improves your safety, reduces fatigue and improves your air consumption. Which all leads to a better enjoyment of diving overall.
Having your own BCD is therefore better for you. You’ll be familiar with the controls and how it affects your buoyancy, so that you don’t have to think too much about this aspect when you’re diving.
For me diver safety is a top priority, and interestingly an Australian study of 533 incidents, 57 of those were associated with BCDs. So where you can eliminate as much risk as possible by having your own BCD this has got to be a good thing.
As with all other scuba equipment there are different types of BCD. The differences between these relates to where the buoyancy is situated within the BCD and whether or not your weight system is incorporated into the jacket or not.
Jacket-style BCD
By far the most popular type of BCD is the ‘jacket-style’ BCD. The jacket style or as I call it the ‘stab-jacket,’ is so called because you wear it like a jacket.
The buoyancy is provided by a built-in bladder that wraps around the diver.
The majority of the buoyancy is located under the arms of the scuba diver. But the buoyancy is located around the back, sides and front for these types of BCD.
They are extremely comfortable to wear and make it easy for the diver to float vertically in the water and on the surface. But also, it’s easy to swim horizontally too when on the bottom on your dive.
You then have two options. The first is to have your weight system built-in to the BCD, where you’ll have weight pouches on either side. These are easily removed either for travel, or in an emergency on a dive.
Use a separate weight belt
The second option is to use a separate weight belt and not have these built-in.
Which of these options you choose with the jacket-style BCD is really down to choice. I personally prefer to go for a separate weight belt. The reason for this is that my weight is consistent each time I dive.
For example, if you’re a UK diver and go for the built-in weight system. On your UK dives you’ll be using the built-in weights, but when you dive overseas, you’ll be using a weight belt, as you’ll not be flying with the detachable weights from your BCD.
More Reading: How long should you wait to fly after diving? (What’s safe?)
The Jacket-style BCD are the most common amongst recreational scuba divers.
I’ve used a jacket-style BCD for all of my nearly 30 years of diving, which has been all over the world in all types of dives. Those dives include ones where I’ve used single 12 litre (80 Cu Ft) dive tanks, 15 litre (100 Cu Ft) dive tanks and also using a twin-set, i.e. where I had a pair of 12 litre (80 Cu Ft) dive tanks on my back.
Which means that the jacket-style BCD is comfortable and has a good range of flexibility for all types of recreational dives you might do.
Back mount or wing-style BCD
The alternative BCD is the back mount or wing-style BCD. These BCD’s have the buoyancy only on the back, which has the benefit of leaving the front of the diver clear.
This style of BCD tend to get used more for technical diving and they tend to have a larger lift capacity than the jack-style BCD. This is useful for the technical diver, as they tend to have more equipment, so need additional lift to return them back to the surface safely.
The down side or disadvantage of the back mount or wing style BCD is that where all the buoyancy is at the back of the diver, in an emergency on the surface, the diver would be put in a face-down position. This is not how you’d want to be in an emergency. Instead, you’d want the casualty to be in a face-up position.
The choice is obviously yours, but for beginner scuba divers looking for their first diving kit, you really should consider the jacket-style BCD only.
7. Dive computer
As mentioned above, I was a bit torn between a buoyancy control device or a dive computer as the next piece of scuba equipment. So as I went with the BCD first, lets now consider a dive computer now.
The first piece of equipment in this article on ‘what equipment do you need to go scuba diving?’ I recommended a diver’s watch.
However, as mentioned before, there is the option of a combined diver’s watch and dive computer in one.
This is one option, and whilst dive computer watches tend to be more expensive than a standard beginner’s dive computer, if you buy the combined gadget, you only need to buy one piece of kit, rather than two separate ones.
When I first started diving myself I didn’t have a dive computer, as although they were available at the time, they were not really trusted then. So I know what it’s like to dive without one.
Safe diving with a modern dive computer
However, having now dived using a dive computer for the majority of my diving experience, I would find it difficult to now dive without one.
It’s a bit like thinking about going back to navigation in a car without the aid of a satnav or GPS. It’s possible to navigate without Satnav or GPS, but it’s so much easier using modern technology. The same goes for a dive computer. This piece of scuba equipment will make your diving so much easier, and in my opinion safer too.
There are many types of computer, which would be a complete article in itself. Dive computers are a bit like watches. There are some watches that are priced low, with others that can cost hundreds if not thousands of Pounds or Dollars to buy.
If you’re looking to buy your first dive computer, you really don’t need to spend too much, and certainly less than $200-250.
So long as it tells you how long you’ve been diving for, how much bottom time you’ve got left without decompression stops, plus it will tell you what decompression stops you must do, when and if you decide to begin ‘decompression-stop-diving’ (although not recommended for beginner scuba divers), plus the dive computer guides your safe ascent from a dive, then that’s about it.
Unless you want to buy one that also has a built-in nitrox gas function too. This is in case you decide to begin using nitrox on your dives.
Wrist dive computer or console style computer
There is another consideration to think about with a dive computer, and that’s whether you go for a wrist style dive computer vs a console style. There are two types of console dive computers; one which is the standard dive computer, but instead of sitting on your wrist, it’s housed in your console alongside your air gauge and compass.
The other type of console dive computer is the integrated type. This type of computer is integrated into your air tank. The dive computer estimates remaining dive time based upon actual air consumption, as it’s linked to the air tank via a pressure hose. The advantage of this type of dive computer is that you have a correct estimate of your remaining dive time, based upon your current depth.
The other type of dive computer is the ones that attach to your wrist like a watch. The benefit of a wrist style dive computer is that it’s just slightly easier to keep watch on your ascent. It’s marginally easier to look at your wrist, rather than hold onto your console.
What next on the list of equipment?
With the equipment listed so far, you’ll be able to dive anywhere in the world without having to hire or rent scuba equipment, as the next two pieces of scuba gear are always provided on all boat trips and are too heavy to transport when travelling by plane.
However, if you intend to dive in your own country where you live, the next two pieces of equipment become a must-buy too.
If you only ever intend to dive overseas, then you’ll never need to buy these. However, if you do intend to dive in your own country, then it’s a good idea to be self sufficient and buy your own weight system and dive tanks.
8. Weight system
The weight system you choose will in part be dependent on the style of BCD you purchase.
If you’ve bought the integrated style of BCD, where the weights are fitted into pouches on the BCD, you may well opt to buy these types of weights too. However, not necessarily, as you can still use a weight belt and not use the pouch weights in the BCD.
If you opt to use a weight belt to compensate your buoyancy, then you’ll need to buy a weight belt and the weights to go on the belt.
There are two types of belt you can buy. I prefer the ones with a metal clip rather than the ones with a plastic style of clip.
The silver metal buckle stands out more from your other equipment and your exposure suit, should there be a problem and this needs to be jettisoned, as it’s much easier to spot. A minor point, but in an emergency speed is of the essence.
The amount of weight you buy for either of the above options will depend on your own personal buoyancy and body make-up, plus what type of diving you are doing and the type of insulation you are wearing.
The greater the buoyancy of the insulation, for example a thicker wetsuit, the more weight you’ll need to buy in order to compensate the added buoyancy.
9. Air tanks or diving cylinders
These come in two main sizes for your main air supply, the first is a 12 litre (80 Cu Ft) and the second is a 15 litre (100 Cu Ft) cylinder.
Most average people buy the smaller of the two, as these will provide a sufficient air supply for most. However, as discussed in this article on how to conserve air when scuba diving, I explained the benefits for larger bodied scuba divers of opting for a 15 litre (100 Cu Ft) dive tank. The larger you are, the more air you’ll consume.
So if you’re larger than the average 89 kilos (196 lbs) male, you will be more air sensitive. Women divers don’t tend to need to worry about this problem, as they consume far less air than men.
You’ll probably need to buy two dive tanks rather than just the one, as more than often you’ll dive twice on most dive trips. You’ll need a separate dive tank for each of those dives.
You also need to take into consideration the routine maintenance and pressure testing required for diver air tanks too.
Other scuba diving equipment to consider
In addition to the essentials of scuba diving equipment, here are a few optional extras that you can invest in over time.
However, if you have the money now, you may wish to invest in these sooner.
10. Divers torch or underwater light
For me, I consider a dive torch or light as an essential piece of dive kit. I take my dive torch on every dive that I do, both day and night dives.
The reason for this is that light does not penetrate water very well and below a few metres or feet almost all the colours are lost. Everything looks brown at depth.
The only way to see the true colour of things underwater is to use a torch or divers light. An example is I only found out the true colour of lion fish when I put my torch light on one. This is when I saw the beautiful red colouration of these unusual fish.
The other benefit of having a dive light is to be able to illuminate dark holes and spaces you come across, like crevices, rocky or coral overhangs and ship wrecks.
More Reading: Why use a diving torch scuba diving (It’s not just for night diving)
11. Divers knife
A scuba divers knife is a handy piece of kit to have for safety purposes. A knife is good safety equipment to carry. If you’re unfortunate to get tangled in nets or rope underwater and need to cut yourself free.
Divers knives are a good safety addition to your scuba gear for diving in UK waters as there are nets and ropes in the seas off the UK coast.
However, not many dive skippers or dive masters in places like the Caribbean or the Red Sea take to divers with divers knives. Most are worried of the diver’s intent to damage the coral or sea life. Also, there are certain rules in some countries around knives, which you need to be aware of.
12. Surface Marker Buoy (SMB)
If at some point you intend to do any drift dives where you’re diving in a current, then you’ll need a surface marker buoy or SMB as a part of your scuba diving equipment.
A surface marker buoy is a buoy which has a flag attached at the surface. This is linked to a diver via a length of cord. The diver is pushed along in the current, and sometimes at quite some speed. The buoy stays at the surface and follows the diver’s course.
The buoy enables the boat skipper to follow the divers during the course of their drift dive.
More Reading: What is a surface marker buoy used for? (Safety diving equipment)
13. Delayed Surface Marker Buoy (Surface sausage) or DSMB
A delayed surface marker buoy or surface sausage is similar to a surface marker buoy, except that it’s only deployed at the end of a dive rather than used throughout the entire dive.
A delayed SMB is an extra safety device to have. Should you get separated from your buddy or diver group, you can deploy this to help the dive boat know here you are. Other uses for a delayed surface marker buoy would include the following:
- Deeper decompression stop dives – deploy the delayed SMB to aid the ascent and decompression stops on the way up.
- If you’re diving a wreck on tidal slack and towards the end of dive the tide begins to run, divers can deploy the delayed SMB to let the boat skipper know where you are drifting to.
- Deploying a delayed SMB in choppier waters will help the boat skipper spot you more easily, as the ‘sausage’ or marker baloon is much easier to see than a diver’s head.
- Use the delayed SMB to help with a safe ascent from a dive.
More Reading: What is a delayed surface marker buoy? (Safety diving equipment)
Having a compass for underwater navigation is a good piece of equipment to have. Underwater navigation is more difficult than it is on land, so a compass is the best way to help with this challenge.
15. Divers slate
I often get comments from divers that I’ve never dived with before about my diver’s slate and how useful it is.
I always dive with a divers slate. It’s very often useful to be able to communicate other than by way of just hand signals.
The slate I have has been used to ask what certain creatures are, used it to explain a problem and all manner of other things.
As a funny aside, I remember writing to my dive buddy at 50 meters (164 feet), or at least in my mind I thought I was writing this; “this is sh1t, shall we abort the dive?” We were diving a wreck out from Dartmouth in the UK and the visibility was only a few feet. The wreck wasn’t exciting either. I remember my buddy looking on confused.
In then end I used the usual scuba diver up hand signal, and we both ascended to the surface. It was only when we were back on board the rib, that we laughed, as I then tried to read what I’d written. It was complete gobbledygook! I can only explain that it was the affect of nitrogen narcosis that was impairing my writing ability.
Back in my diver training days, I often used the diver’s slate to communicate with my students on their first dives in the sea.
16. Emergency signalling devices
As an extra safety precaution, and especially if you plan to do night diving, adding emergency signalling devices such as strobe lights to your scuba equipment would be a safe thing to do.
These attached to your BCD and emit an intermittent flash. This indicates your position to your buddy. It also helps you to be seen when you’re on the surface should your diver’s torch fail.
17. Backup dive tables
I always recommend you have your backup dive tables, so that you can plan your dives. So that even if you’re diving using a computer, you know your bottom times and any decompression stops for all your dives.
18. Dive bag
This could be one of the bits of kit that should really get bumped up the list, as you’ll need dive bags to carry your kit.
There are many options for dive bags, which include a large dive bag for most of you kit, except for dive cylinders.
These are mostly useful for diving in your own country, but they can also be used for traveling too. I have a dive bag that I use when I go to places like the Red Sea liveaboard dive trips.
I also own a collapsible dive bag, which is extremely handy for travelling with. This collapsible dive bag is what I use for my trips to the Caribbean with my wife.
When we travel, my dive kit is put into one of our normal suit cases. When I get there, I transfer my dive kit to this collapsible bag when we arrive at the resort. I then use this bag to transport my dive kit to the dive boat each time I dive.
19. Cameras, video cameras and Gopros
You may want to capture some of the beauty and experiences of your underwater adventures on a camera or on video using a Gopro.
I used to have an underwater camera until this got stolen, but have since not replaced it. However, I am now thinking that I may get myself an underwater Gopro setup to film my diving exploits.
You may wish to do the same, but if you do, make sure you check the depth of the camera or Gopro casing and that it can be taken to the depths you intend to go.
You can also get a casing to house your phone, and use this as an underwater camera too. However, make sure you buy a suitable housing to protect your phone, as phones don’t tend to work too well after getting wet.
Plus getting sea water in the electronics of a phone is even worse.
I hope you enjoyed this article about Scuba diving equipment essentials
I’d love to hear from you. Tell us about your adventures of diving and snorkeling, in the comments below. Please also share your photos. Either from your underwater cameras or videos from your waterproof Gopro’s!
If this article hasn’t answered all of your questions. If you have more questions either about snorkeling or scuba diving (or specifically about scuba diving equipment essentials), please comment below with your questions.
There will also be many more articles about scuba diving (and snorkeling) for you to read and learn about these fabulous sports.
Have fun and be safe!